Category Archives: Food
Chocolate-Dipped Stuffed Strawberries
Just to forewarn you, this is a picture heavy post. It was necessary, trust me, you’ll love it! I hope you enjoy!
 My idea for these came when I read an article to my husband about cupcake stuffed strawberries. Not being a big fan of cake pops, he suggested using the cream cheese icing that I made for the purple velvet cupcakes. That sounded like a great idea! Unfortunately for me, it was not an original idea. I really thought we were on to something, but to my dismay, others had the same idea long before we did. A chef in Maine went so far as to patent the stuffed strawberry concept. She stuffed hers with all kinds of cheesecake.
These were super easy to make, but time-consuming because you need to make them in steps…Oh, and having a partner helps if that is possible. They turn out so pretty and would make a great showing at any engagement.
I halved the cream cheese icing recipe and had plenty leftover. I filled and dipped a 1 pound package of berries. I could have easily filled a second package, quite possibly a third. What I didn’t have enough of was the chocolate. I really should have used a package and a half, but I made it work.
So here is what you will need:
- 1 pound package of strawberries; rinsed and dried
- 1 8oz package of cream cheese-softened
- 1 stick of unsalted butter-softened
- 2 cups of powdered sugar
- 1/2 tsp vanilla
- 1 1/2 pkgs or 12 squares of Baker’s semi-sweet baking chocolate squares
- Decorating bag or 1-gallon ziploc storage bag
- #10 tip or cut corner of ziploc bag, but not too much!
 1. Rinse your berries in a colander and allow to drain well. Place colander into fridge until berries are dry.
 3. If you’re using a decorating tip, cut bag and fit with tip. Fill bag with icing and twist top enough to release air, but don’t allow icing to come through tip. Set on a plate and place in fridge until ready to use. **If you are only using the ziploc bag and no tip, do not cut corner of bag until ready to use.
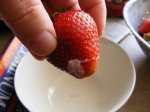
 6. Cut the tip of the strawberry in a “V”. Insert tip of icing bag and fill, but do not over do it. Just enough so the berry is full and just a little more so it will act like the “glue” to hold the tip back in place. Replace the tip making sure to line it back up just right. Place on foil-lined cookie sheet. Repeat with rest of berries and filling.
 9. Keeping berries in the freezer, remove only 2 or 3 at a time to dip. Once dipped, return to the freezer. Repeat until all berries are dipped. **The icing that holds the ends on softens pretty quick and once they do, when you dip, they will fall off. Trust me on this one.
Ham-n-Tots Casserole
Do you ever just get the “I don’t want to and you can’t make me, nanny, nanny boo-boo’s”? Today, that was my attitude. The last thing I wanted to do was come home and cook dinner. (Dang, why did I give the maid the night off?!) I had promised my husband for quite sometime that I would make him a tater tot casserole. Tonight was the night! Originally, I was going to make it as a side dish, but because of my laziness, I decided I wanted to make it into a complete meal.
The original recipe does not include meat. On Cooks.com,there were several recipes that incorporated browned ground beef and some added green beans or broccoli. I remembered I had some ham in the freezer and thought that would be a good idea. I chose not to add veggies because I planned on serving a side salad.
It is a good, hearty meal, and I think this would be super on a cold fall or winter night, especially before heading out to the football game on a Friday night. It was effortless. Exactly what I was looking for. Kids would totally dig this too!
Thanks for stopping by! Enjoy the rest of your week!

| TATER TOT CASSEROLE-adapted from http://www.cooks.com | |
|
Ingredients:
Directions:
|
|
In other news…
What happened to “Food Fact Fridays”? I learned a valuable lesson Thursday night. I was on the phone with my sister, who lives in NJ, and we don’t get to talk often. When we do, it’s an evening of catching up and “what’s new with you.”. At the same time as I was talking with her Thursday night, I was preparing my Friday post. I am usually pretty good at multi-tasking, but apparently not talking on the phone and typing. The problem, you see, wasn’t in the typing. It was in the saving. I thought I had saved what I typed before shutting everything down for the night. Friday morning when I went to make the post…ummm…not on my computer…bummer…Did you need to know all that? I don’t know. I did feel like I owed an explanation. So, to those of my faithful followers I apologize for being neglectful.
In other news, these are just a few things I wanted to share with you:
* Back before Easter, Geni over at Sweet and Crumby, ran a contest, partnered with McCormick, for a really nice gift pack of their products. Two lucky winners were drawn. Myself and Lianna at The Little Spork were the lucky recipients! Yeah! Lianna was a good girl and posted right away. I have been a bad girl because my intentions were to make a recipe from McCormick and post it along with thanking Geni and McCormick for the wonderful prize. I still intend on making something, but my thank you is long overdue! My apologies Geni for being so lackadaisical.
*Every year Pillsbury has a $1 Million Bake-off contest. This year I decided to enter. I was going to make something savory, but ended up entering with a pie that I make. During the summer, Pillsbury selects 20 recipes to go head-to-head, two at a time, for online voting which will result in 10 finalists. That will begin very soon. The remaining 90 finalists will be chosen and notified by Pillsbury sometime after September 1st. If my recipe is chosen for online voting, I will be notified 2 weeks in advance of when it will go live and then everyone has two weeks to vote for my recipe. I will let you know if that happens. Either way, being a finalist would be an awesome experience! I will keep you posted.
*I love Asian cooking. I have a wok and I can make a pretty mean pork fried rice. I have even dabbled with making eggrolls. Anyway, through twitter, quite a while back, I started following Rasa Malaysia which is an Asian cooking website. Bee, the author of the website, is about to release her very first cook book. Back in August on her website she was looking for recipe testers. She selected about 88 testers out of about 350 responses. I was very honored to be selected as a tester! The book is about to be released overseas. The U.S. release is set for September. I am very excited because all the testers will be listed in the acknowledgements section of the book. Once the book is released here, I can share with you the recipe I tested and my pictures of the dish. Can’t wait!
*In some non-food related news, friends of mine back in NJ have started a new business venture. They are lovely twin sisters and along with their equally lovely younger sister have started creating and selling accessories for Babies/Toddlers/Tweens/Teens/Women. Their web store went live this week. Most of their creations are handcrafted. If you have a few minutes, please check out their site. Not all of what they will offer is in the store yet, but they are adding new items almost daily. www.tresorellasonline.com
I hope you are having a wonderful weekend!


